How to Use the Correct Drill Bit
The knifemakers at Olde Towne Cutlery have assembled a drill bit chart with corresponding bit sizes for proper fit when assembling knives using epoxy and rods and pins.
The challenge arises because if you drill a 1/4″ hole using a 1/4″ drill bit, you still cannot put a 1/4″ pin in that 1/4″ hole. Why? We are still having to think about that one a little bit more… But it cannot be done without enlarging the hole or sanding the rod down; which can both result in a “halo” of epoxy around the pin. This takes away from the quality of the fit and finish, and producing a perfect fit with your pinup is just a step away.
Using the exact right bit with a drill press that can drill a 90 degree hole is important. Some makers try to use “letter-style” bits; which are slightly larger than the corresponding size which enable an inside diameter of the size to fit inside the outside diameter hole. The problem with letter style bits is that they are either too loose (leaving a halo) or too tight (not allowing dry fit-up which means there is no room for epoxy), as the sizes change. The solution is the fractional equivalency chart below.
This painstakingly assembled information is the result of tedious experimentation with various sizes. The way to read this chart is simply to reference the rod size you are using as the fraction on the left, and use the drill bit size on the right. The two columns in the middle are the calculations from fraction to decimal and then over to metric.
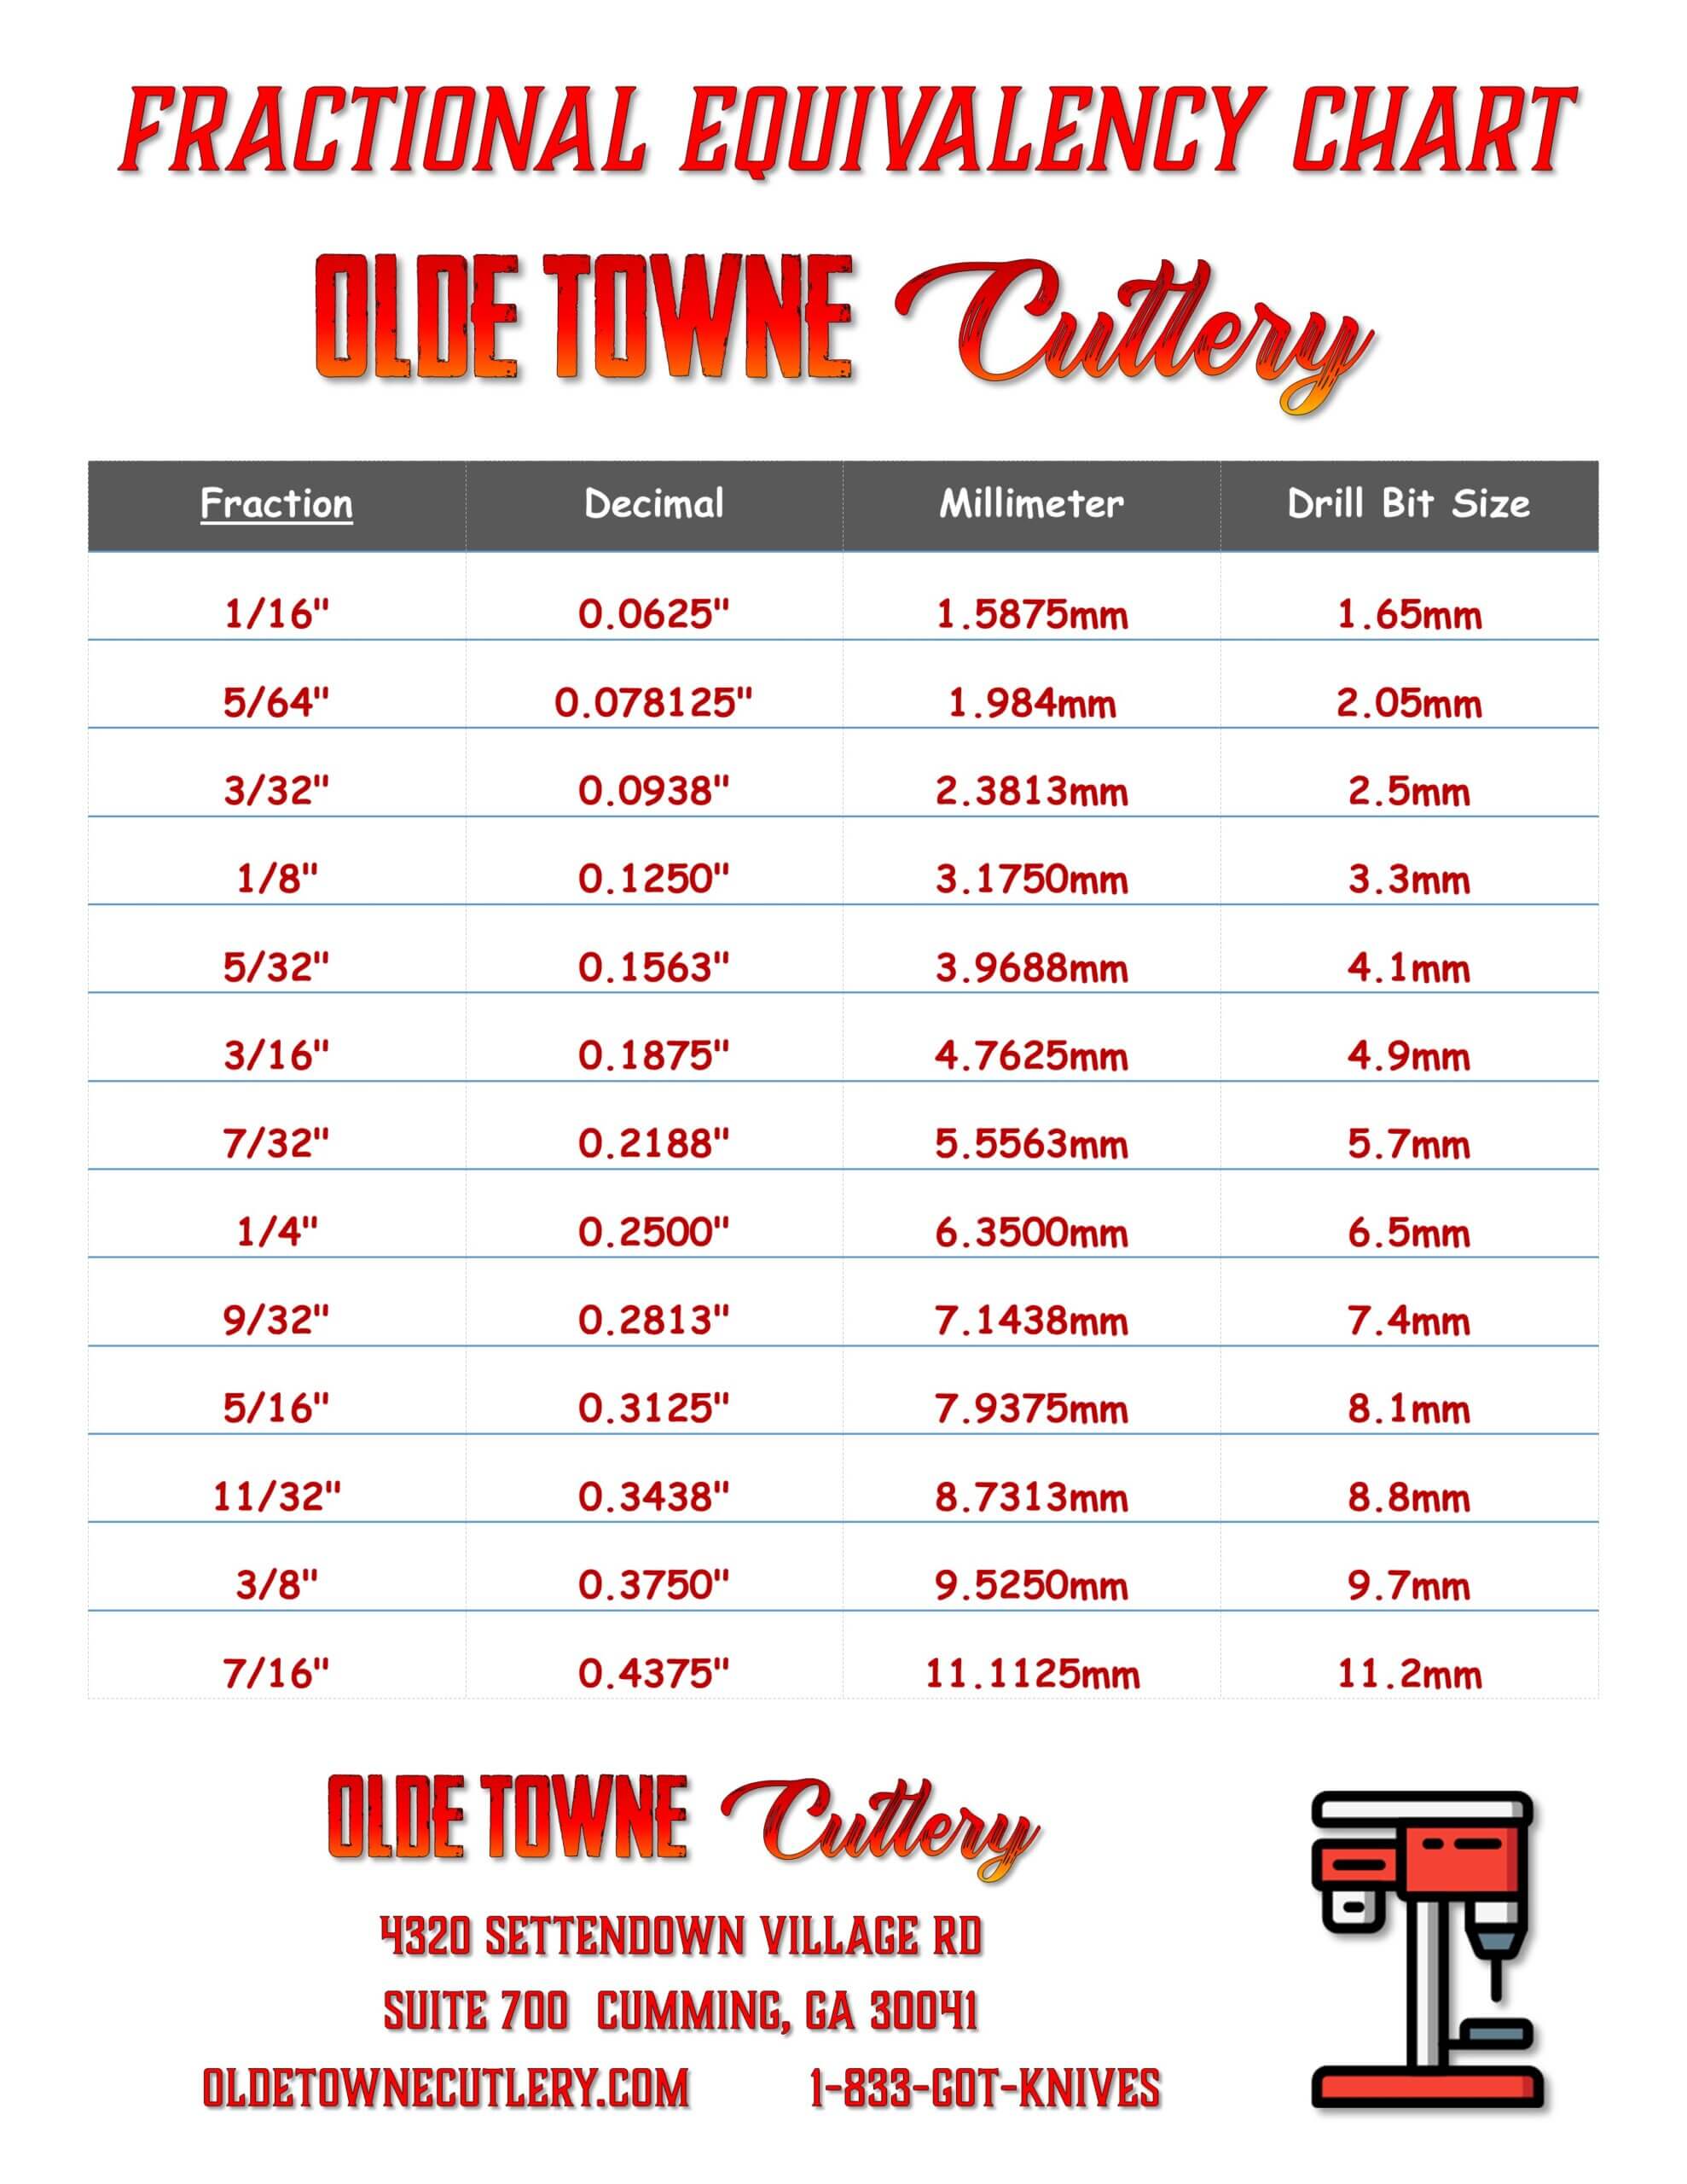
*Note that it is not that using metric is better. If using a metric size pin, you still have the same problem and it may be that a fractional drill bit is the size which drills the best size hole for the application.
Printable PDF Fractional Equivalency Chart
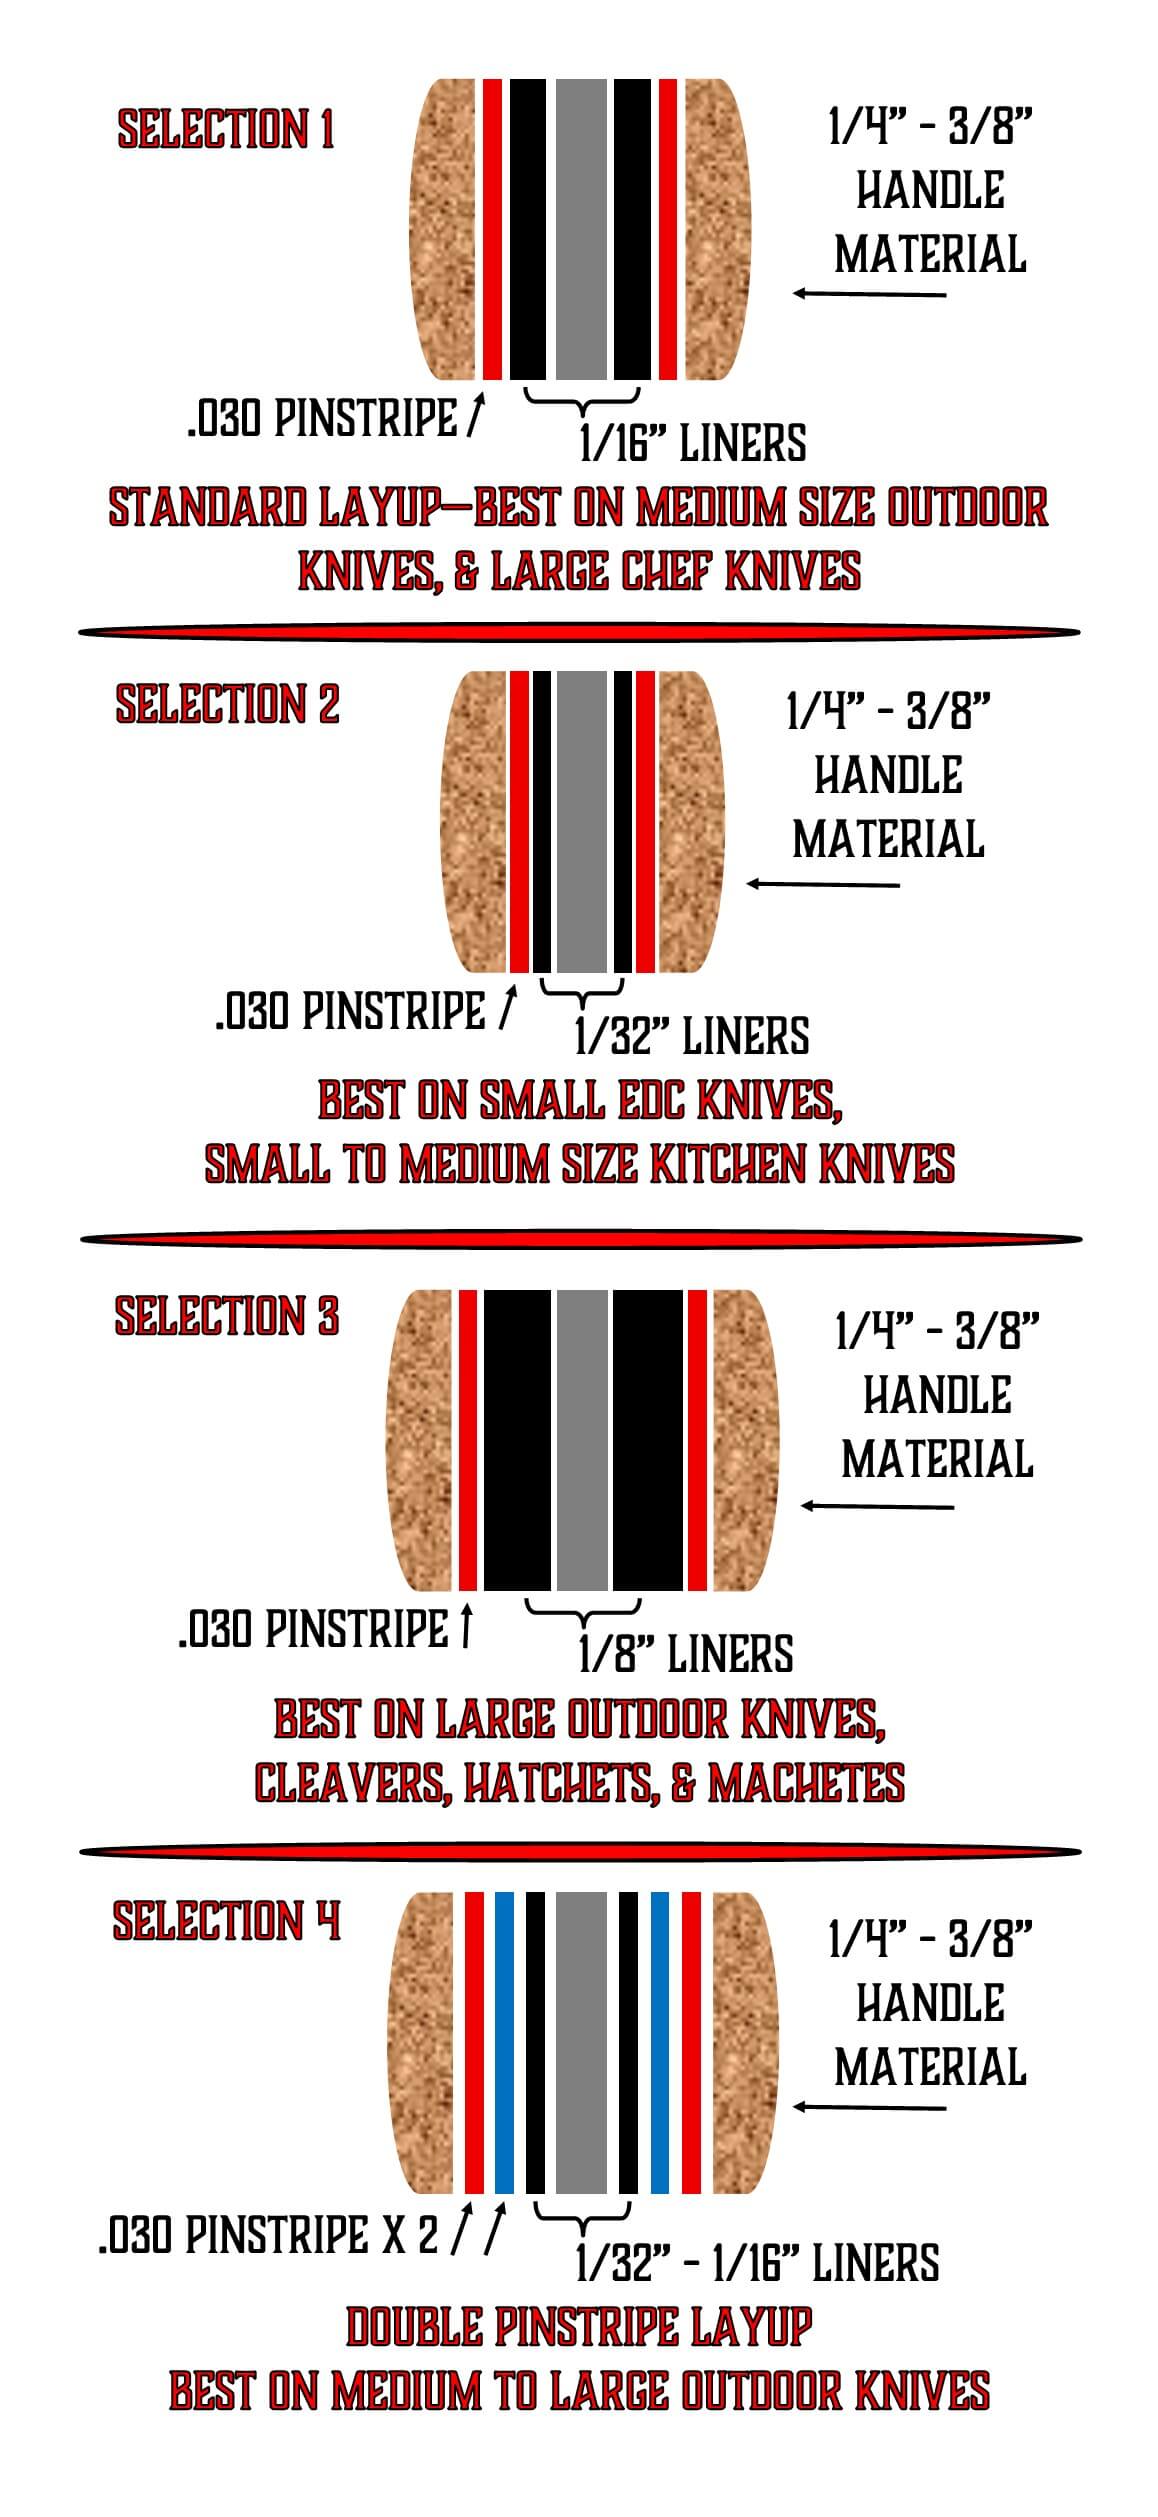
How to Calculate Liner Thickness with Pinstripe and Handle Material
Gluing up a multi-layered handle can be complicated and it is easy to mis-judge the proper thickness of materials. Through endless experimentation, we have created a guide which can help visualize the proper thickness of the components for different types of knives.
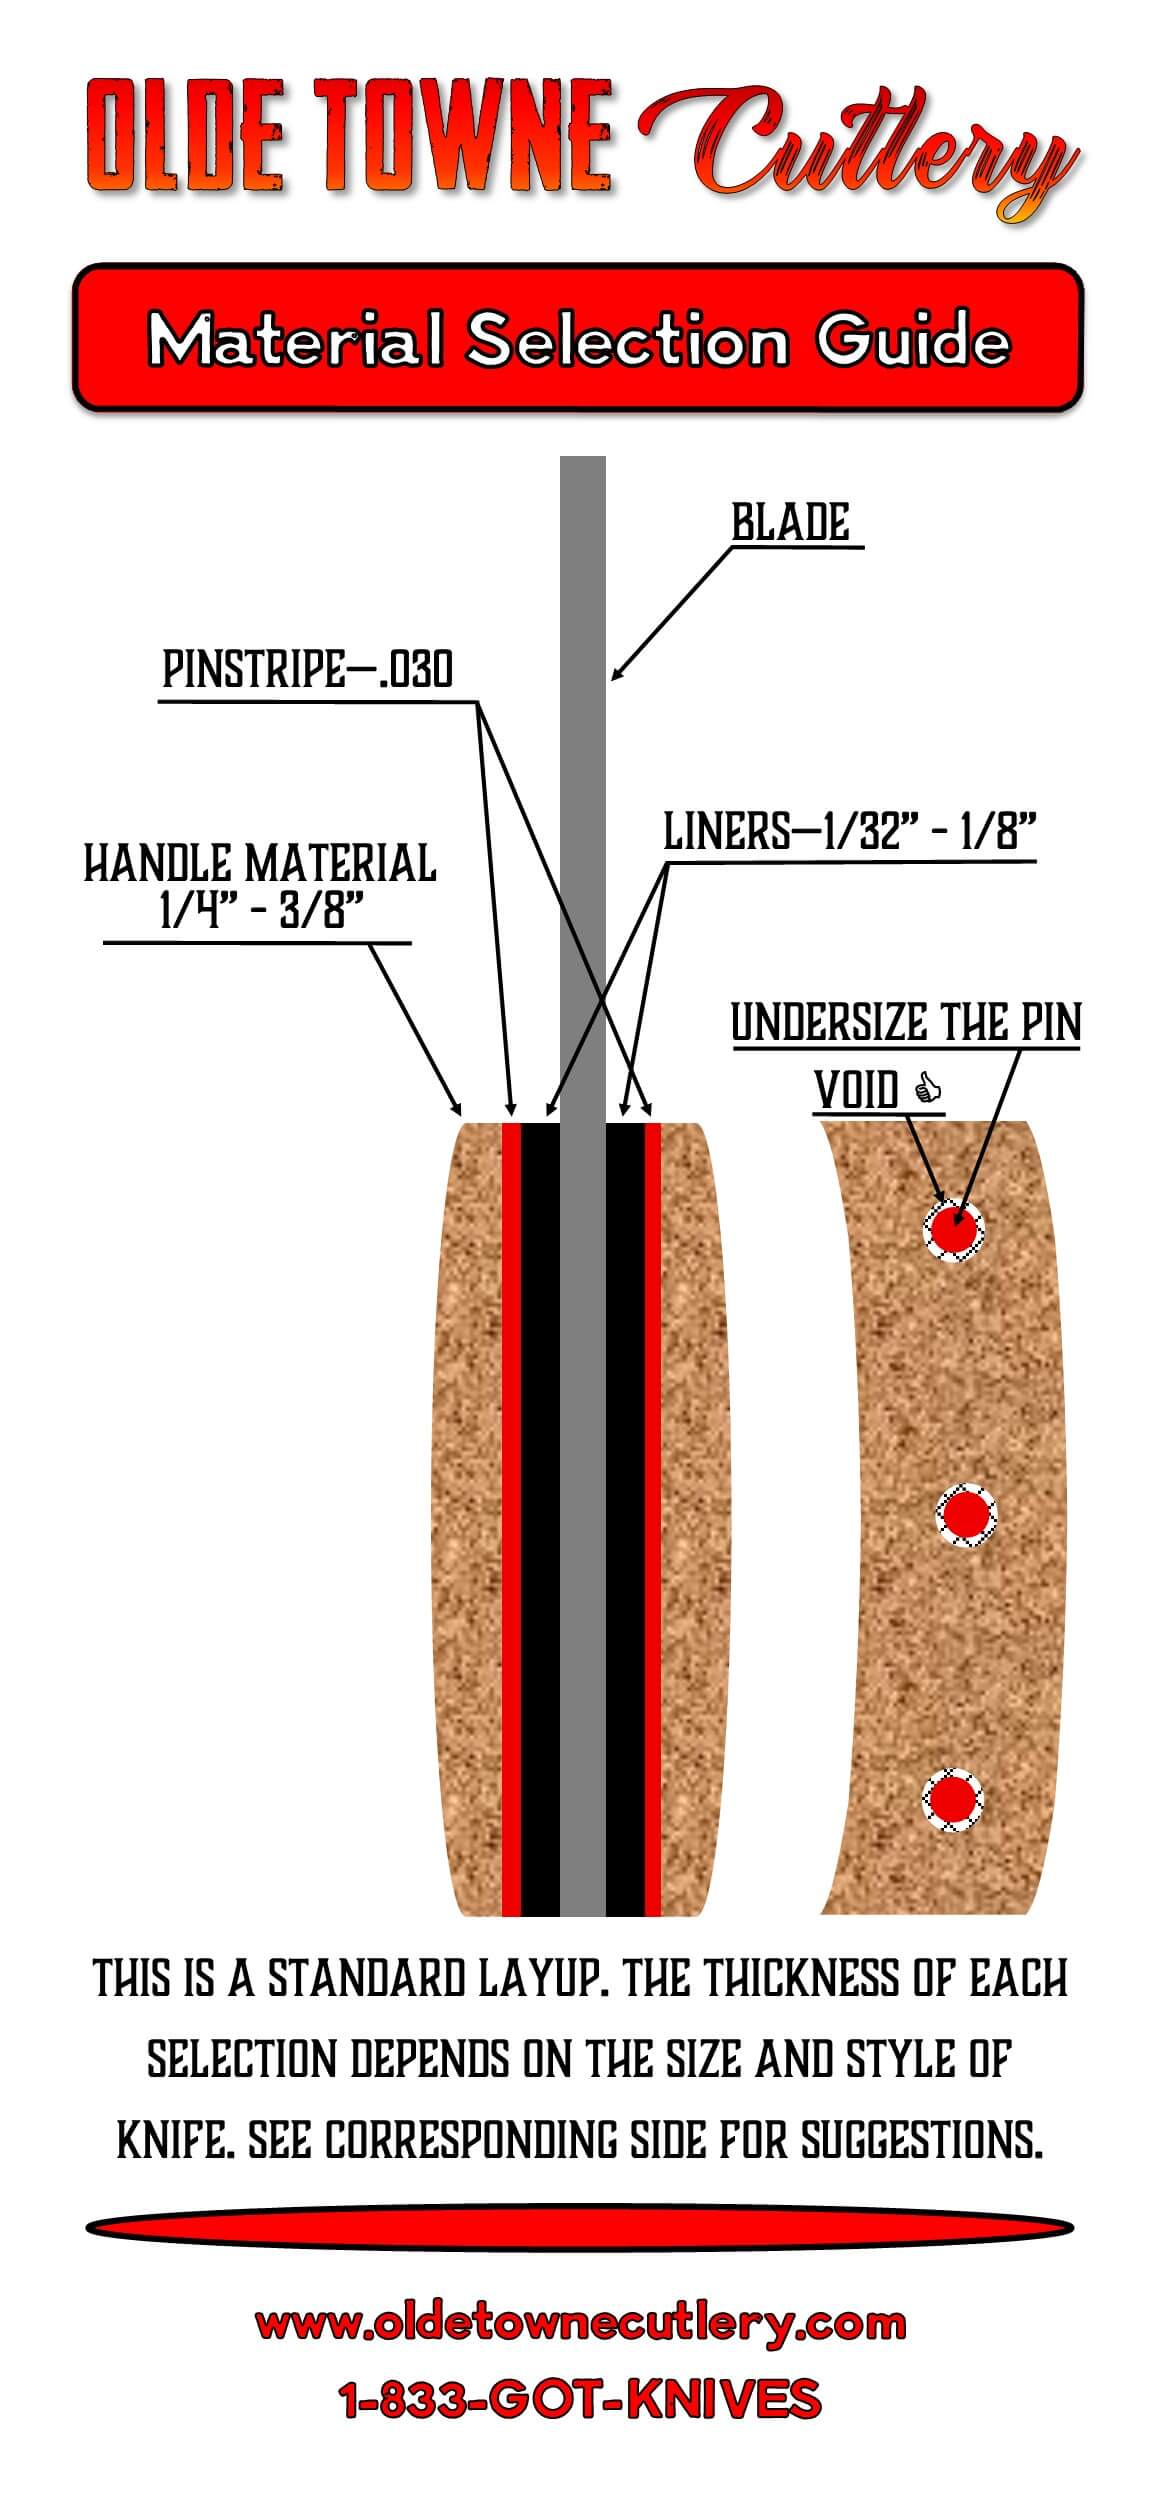
*Note the comment about undersizing the pin to the hole in the tang of the blade. We almost always use a pin size that is the size below that hold size. Meaning if he hole is 7/32″, we will use a 3/16″ rod to make our pins. The reason is because we do not want the knife to bind on multiple pins when assembling, and the small space around the pin inside the handle will be filled with epoxy. The end result is easier assembly a rock solid handle. Epoxy such as G-Flex and G5 by West System are ideal for this application.
In the exploded-diagram below, the black represents the liner, with the red being the pinstripe (the last diagram having a blue and red pinstripe on a black liner.) The thickness of the handle material is usually between 1/4″ and 3/8″ thick. pinstripe material measures 1/32″ or .030″ Therefore the liner thickness can vary significantly depending on the type of knife. Meaning a pairing knife needs a thin and lighter-weight handle, whereas a bushcraft knife needs to fill out the hand with a thicker grip.